 Jsonnet - json数据模板语言
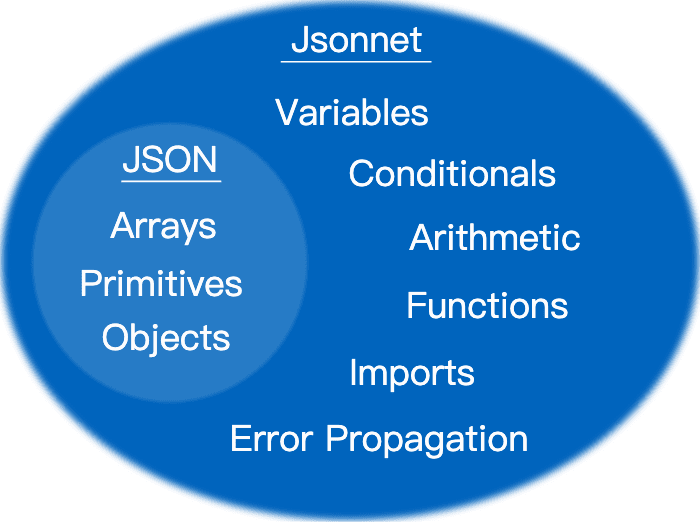
Jsonnet: 谷歌开发的json数据模板语言。特点:支持注释、引用、算术运算、条件操作符,数组和对象内含,引入,函数,局部变量,继承等。
GitHub:https://github.com/google/jsonnet
官方语言示例:https://github.com/google/jsonnet/tree/master/examples
# 一、安装
brew install jsonnet
# 二、工具
VSCode- 插件:
Jsonnet NG: 支持语法高亮,保存预览
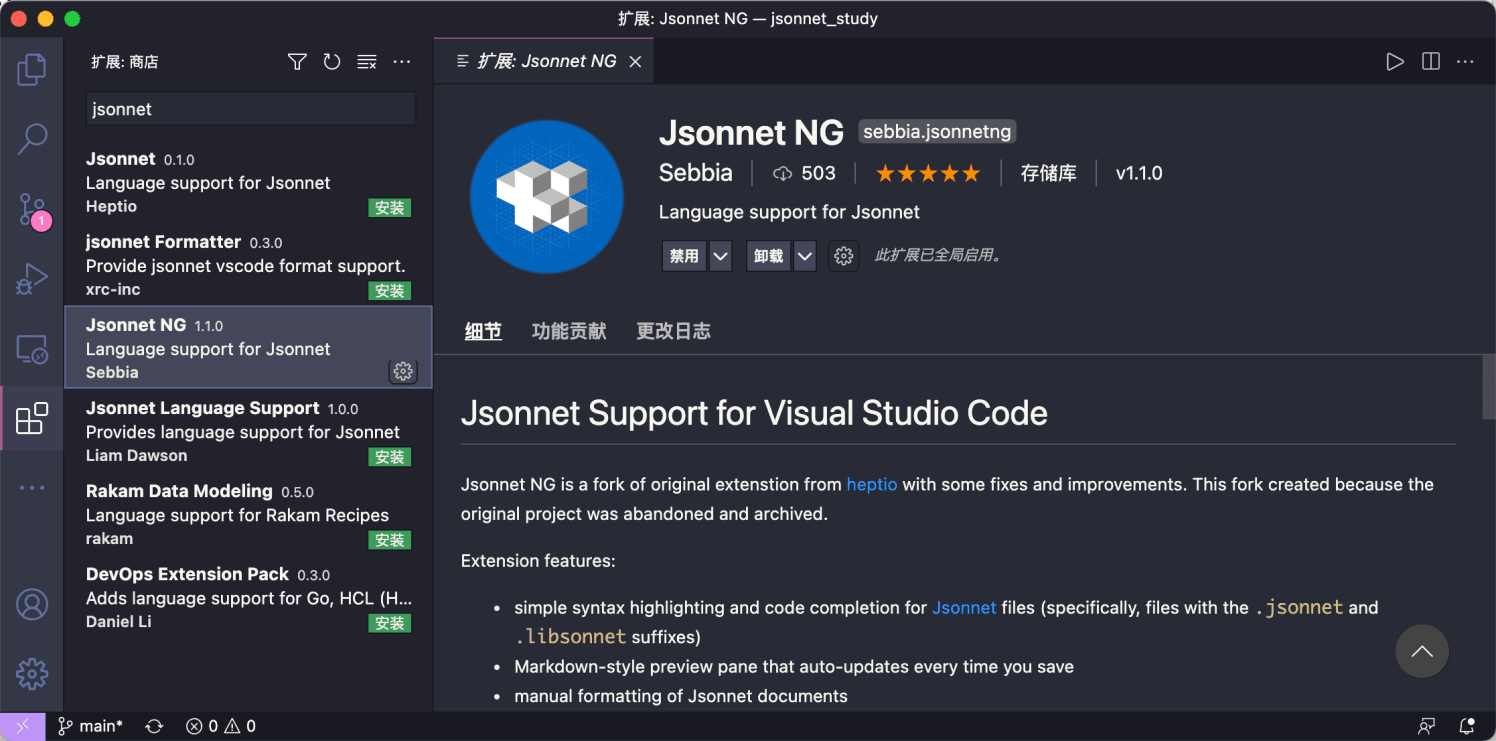
安装完该插件后,点击右上角的预览按钮即可


默认的预览结果是 yaml 格式,可以在设置中搜索 jsonnet preview 找到对应的设置项,选择 json 即可。

# 三、特点
# 1、字段
# 定义
字段名可以不加引号,但是如果有空格则必须加引号
{
  field1: 'lxf1',
  "field 2": 'lxf2'
}
# 隐藏字段
定义的字段不会被输出到 json 结果中
{
  local name = 'LXF', # 定义在字段旁的变量以逗号结尾
  language:: 'jsonnet',
  lxf: {
    lang: $.language,
    author: name
  }
}
结果:
{
    "lxf": {
        "author": "LXF",
        "lang": "jsonnet"
    }
}
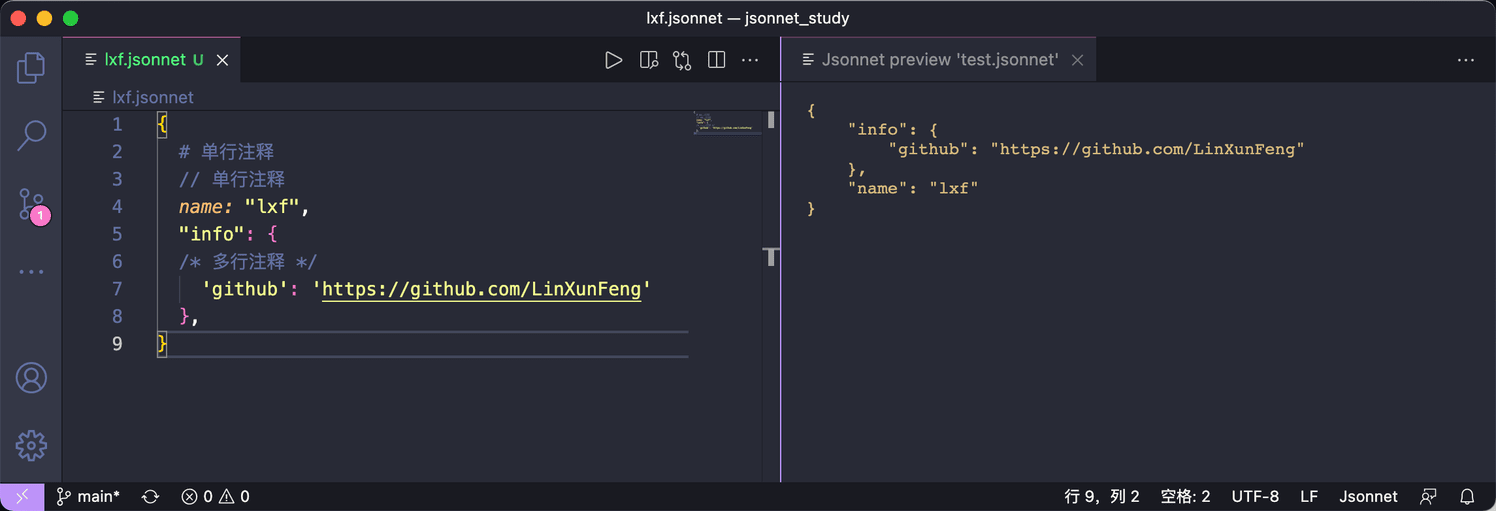
# 2、注释
#  单行注释
// 单行注释

/*
多行注释
*/
# 3、字符串
# 引号
单引号与双引号没有区别
# 单行逐字字符串
# 单行逐字字符串:使用 @
{
  "single line": @'hello \ lxf'
}
结果:
{
  "single line": "hello \\ lxf"
}
# 多行逐字字符串
# 多行逐字字符串:使用 |||
{
  "multiple line": |||
  	hello
  	lxf
  |||,
}
结果:
{
  "multiple line": "hello\nlxf\n"
}
# 拼接
{
  pi:: 3.1415926,
  format: 'Hello, %s' % 'lxf',
  concat: 'Hello, ' + 'lxf',
  format1: |||
    hello
    pi=%(pi)0.2f
  ||| % self,
}
结果:
{
    "concat": "Hello, lxf",
    "format": "Hello, lxf",
    "format1": "hello\npi=3.14\n"
}
# 4、变量
# 定义
- 使用
local关键字定义一个变量 - 定义在字段旁的变量以逗号(
,)结尾,其它情况定义的变量以分号(;)结尾
local github = 'https://github.com/LinXunFeng'; # 不是定义在字段旁的变量以分号结尾
{
  local name = 'LinXunFeng', # 定义在字段旁的变量以逗号结尾
  language:: 'jsonnet',
  lxf: {
    target: $.language,
    author: name,
    by: self.author,
    address: github
  }
}
结果:
{
  "lxf": {
    "address": "https://github.com/LinXunFeng",
    "author": "LinXunFeng",
    "by": "LinXunFeng",
    "target": "jsonnet"
  }
}
# 引用
变量名:就近原则
self关键字:指向当前对象$关键字:指向根对象['字段名']:用于查找一个字段.字段名:取出一个字段,但这个字段名需要符合常规的命名标准(不能以数字开头,不能有空格等...)[数字]:用于取出数组元素允许长路径
字符串和数组允许像
python那样使用数组切片,如arr[10:20:2]
local github = 'https://github.com/LinXunFeng';
{
  local name = 'LXF',
  language:: 'jsonnet',
  lxf: {
    target: $.language,
    author: name,
    by: self.author,
    address: github,
    languages: ['oc', 'swift', 'python'],
    nums: [1.8, 11, 22, 33, 44, 55],
  },
  lqr: {
    local name = "fsa_fullstackaction",
    languages: ['java', 'kotlin', 'python'],
    scores: $.lxf.nums[1:3],
    organization: name[4:],
    height: $['lxf'].nums[0] + 'm'
  },
}
结果:
{
  "lqr": {
    "height": "1.8m",
    "languages": [
      "java",
      "kotlin",
      "python"
    ],
    "organization": "fullstackaction",
    "scores": [
      11,
      22
    ]
  },
  "lxf": {
    "address": "https://github.com/LinXunFeng",
    "author": "LXF",
    "by": "LXF",
    "languages": [
      "oc",
      "swift",
      "python"
    ],
    "nums": [
      1.8,
      11,
      22,
      33,
      44,
      55
    ],
    "target": "jsonnet"
  }
}
# 5、四则运算
支持四则运算,位运算,比较逻辑
+运算时遇到字符串,会将数值转成字符串进行拼接字符串可以进行比较
使用
in关键字判断一个字段是否对指定对象中
{
  info: {
    name: 'LinXunFeng'
  },
  ex1: (1 + 2) / 3 * 4,
  ex2: 1 << 2,
  ex3: 'a' <= 'b',
  ex4: 'a' == 'b',
  ex5: 5 + 6 + '1' + 1,
  ex6: 'name' in self.info,
}
结果:
{
    "ex1": 4,
    "ex2": 4,
    "ex3": true,
    "ex4": false,
    "ex5": "1111",
    "ex6": true,
    "info": {
        "name": "LinXunFeng"
    }
}
# 5、函数
支持位置参数、具名参数和默认参数
支持闭包
大量常用函数已被定义于 standard library (opens new window)
local addNumber(number) = function(x) number + x;
local add2 = addNumber(2);
local add3 = addNumber(3);
{
  # 闭包
  closures: [
    add2(2),
    add3(5)
  ],
  # 定义函数
  local sayHello(name) = 'hello %s' % name,
  sum(x, y):: x + y,
  newPerson(name='lxf', age=18, gender='male'):: {
    name: name,
    age: age,
    gender: gender,
  },
  # 调用函数
  call_say_hello: sayHello('lxf'),
  call_sum: $.sum(1, 2),
  lxf: $.newPerson(age=3),
  standard_lib: std.join(' ', std.split('foo/bar', '/')),
  len: [
    std.length('hello'),
    std.length([1, 2, 3])
  ],
}
结果:
{
    "call_say_hello": "hello lxf",
    "call_sum": 3,
    "closures": [
        4,
        8
    ],
    "len": [
        5,
        3
    ],
    "lxf": {
        "age": 3,
        "gender": "male",
        "name": "lxf"
    },
    "standard_lib": "foo bar"
}
# 6、条件语句
表达式:if a then b else c,其它 else 是可选的,默认返回 null
local Person(isFemale) = {
  name: 'lxf',
  age: 18,
  gender: if isFemale then 'female' else 'male',
  [if isFemale then 'clothing']: 'dress',
};

{
  condition1: if 2 > 1 then 'true' else 'false',
  condition2: if 2 < 1 then 'true',
  male: Person(false),
  female: Person(true),
}
结果:
{
    "condition1": "true",
    "condition2": null,
    "female": {
        "age": 18,
        "clothing": "dress",
        "gender": "female",
        "name": "lxf"
    },
    "male": {
        "age": 18,
        "gender": "male",
        "name": "lxf"
    }
}
# 7、对象合并
使用
+运算符来组合两个对象, 如果遇到字段冲突, 则使用右侧对象中的字段右对象中可以使用
super关键字引用左对象中的字段使用
+:运算符组合两个对象时,右对象会对左对象中已有的字段进行覆盖,没有的字段则会添加进去
# +
local base = {
    f: 2,
    g: self.f + 100,
};
base + {
    f: 5,
    old_f: super.f,
    old_g: super.g,
}

##################################

# +:
local base = {
    override: {
        x: 1,
    },
    composite+: {
        x: 1,
    },
};
{
    override: {
      y: 2,
      z: 3
    },
    composite: {
      y: 4,
      z: 5
    },
} + base
结果:
# +
{
    "f": 5,
    "g": 105,
    "old_f": 2,
    "old_g": 105
}

##################################

# +:

{
    "composite": {
        "x": 1,
        "y": 4,
        "z": 5
    },
    "override": {
        "x": 1
    }
}
# 8、模板导入
类似于复制/粘贴代码
同样可以用来导入
json原生数据模板文件的后缀统一为
.libsonnet使用
import关键字,导入模板内容并使用指定的变量进行存储
模板内容
{
  newPerson(
    name,
    country='China',
    age=18
  ):: {
    name: name,
    country: country,
    age: age,
    belly: [],
    eat(food):: self + {
      belly+: [food],
    },
  },
}
使用模板
# libs/lxflib.libsonnet 为模板路径,在当前目录的libs目录下
local personTemplate = import 'libs/lxflib.libsonnet';

personTemplate
  .newPerson(name='lxf', age=3)
  .eat('rice')
  .eat('pear')
结果:
{
    "age": 3,
    "belly": [
        "rice",
        "pear"
    ],
    "country": "China",
    "name": "lxf"
}
# 四、终端使用
# 1、基本使用
# 简单的代码可以使用 -e 直接运行
jsonnet -e '{key: 1+2}'

查看 jsonnet 文件的转换结果
jsonnet shuttle.jsonnet
# 2、指定库路径
如果 jsonnet 文件中有引入模板文件,但是只写模板文件的命名,不包含路径
# lxflib.libsonnet是在当前目录的 libs 目录下,即 ./libs/lxflib.libsonnet
local personTemplate = import 'lxflib.libsonnet';
这种情况直接执行命令是会报错的
RUNTIME ERROR: couldn't open import "lxflib.libsonnet": no match locally or in the Jsonnet library paths.
这个时候你有两个选择
选择一:老老实实在导入时写上完整的相对路径
local personTemplate = import 'libs/lxflib.libsonnet';
选择二:使用 -J <dir> 参数
jsonnet -J ./libs shuttle.jsonnet
# 3、导出结果至文件
使用 jsonnet 文件导出 json 文件
jsonnet shuttle.jsonnet -o shuttle.json
# 4、多文件输出
Jsonnet 还支持使用一个 jsonnet 文件,生成多个 json 文件的场景,如同时生成 a.json 和 b.json 两个文件
{
  "a.json": {
    x: 1,
    y: $["b.json"].y,
  },
  "b.json": {
    x: $["a.json"].x,
    y: 2,
  },
}
命令
# jsonnet -m <dir> jsonnet文件
jsonnet -m . multiple_output.jsonnet
结果:
$ cat a.json
{
   "x": 1,
   "y": 2
}

$ cat b.json
{
   "x": 1,
   "y": 2
}
# 五、应用
为了提高我们的工作效率,经常是将常用的一些命令进行整理和保存。
比如像我就是这样,并且会搭配 Shuttle (opens new window) (一款使用 json 来配置终端命令的快捷菜单软件)一块使用。
如下图所示,我添加了触发远端 Jenkins 进行打包的命令,但是远端的构建机因为一些原因会在两个固定的 ip 进行切换,所以我添加了两条,仅仅只是 ip 不同
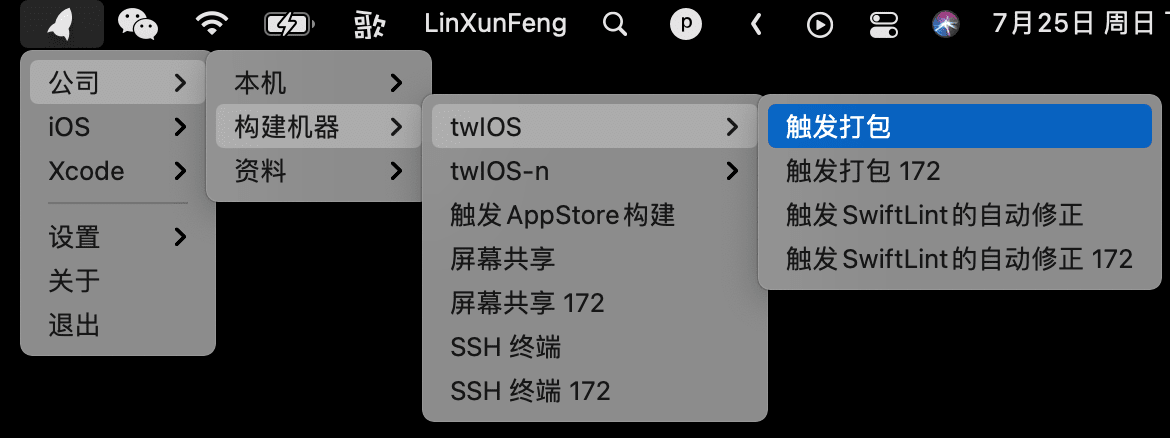
但是除了打包功能外,其它的功能也与构建机 ip 有关,所以一旦添加一个 ip,我们需要修改的地方就会很多,而且也发现命令都一模一样,如果哪天命令变了。。。😭
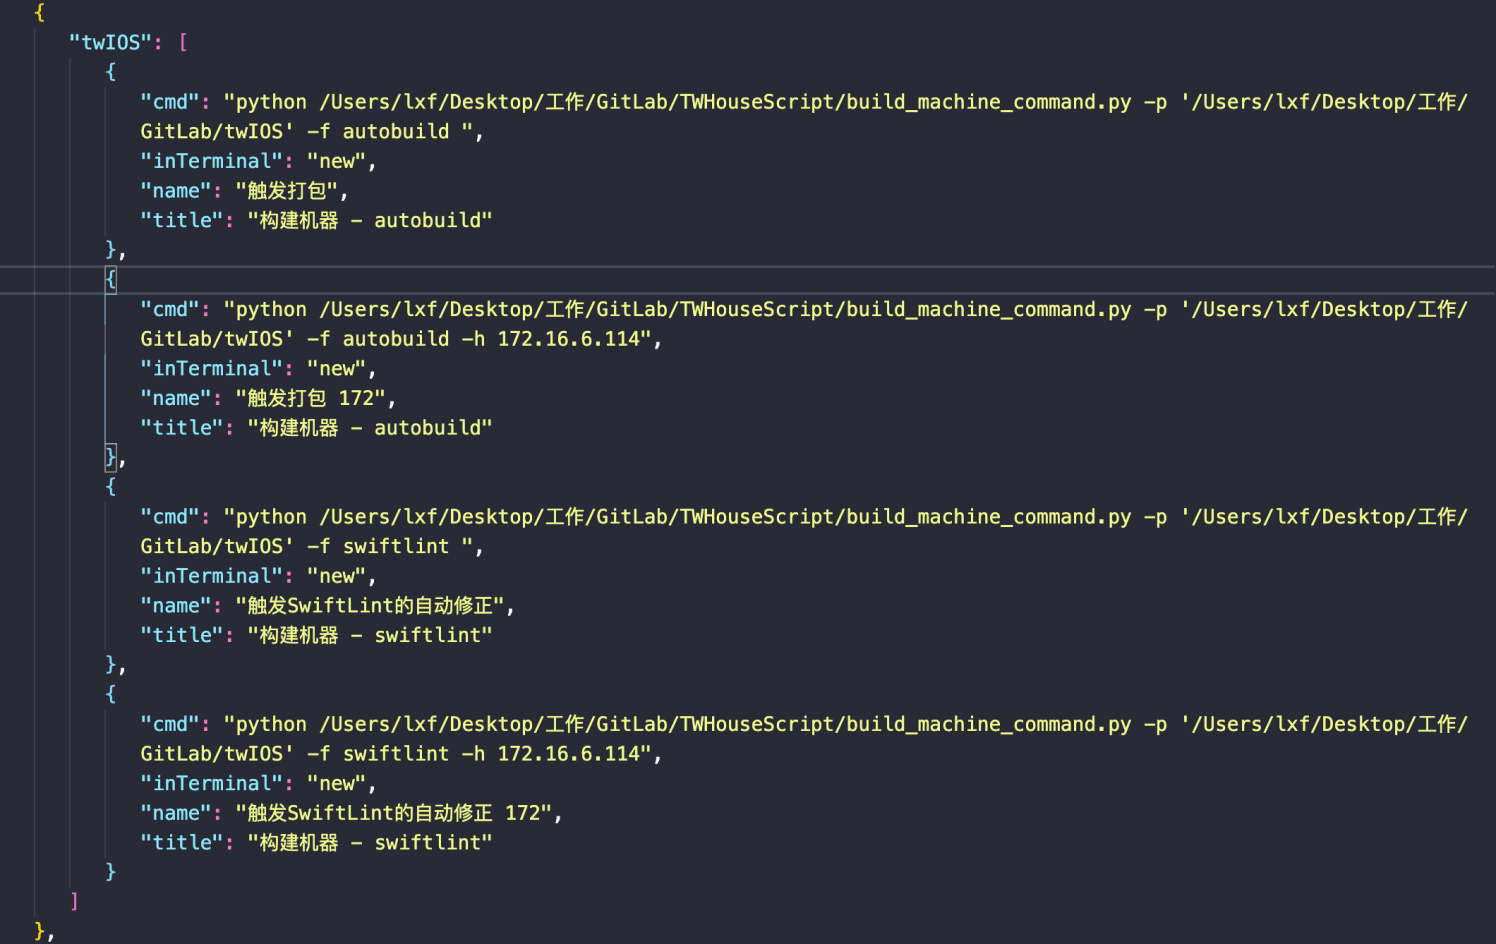
所以像这种情况,我们就需要借助于 Jsonnet 来帮我们把简化这些内容。
如下图左侧,我在 libs 目录下定义了一些常用的模板,并将一些常量配置放入到 constant.libsonnet 模板文件中
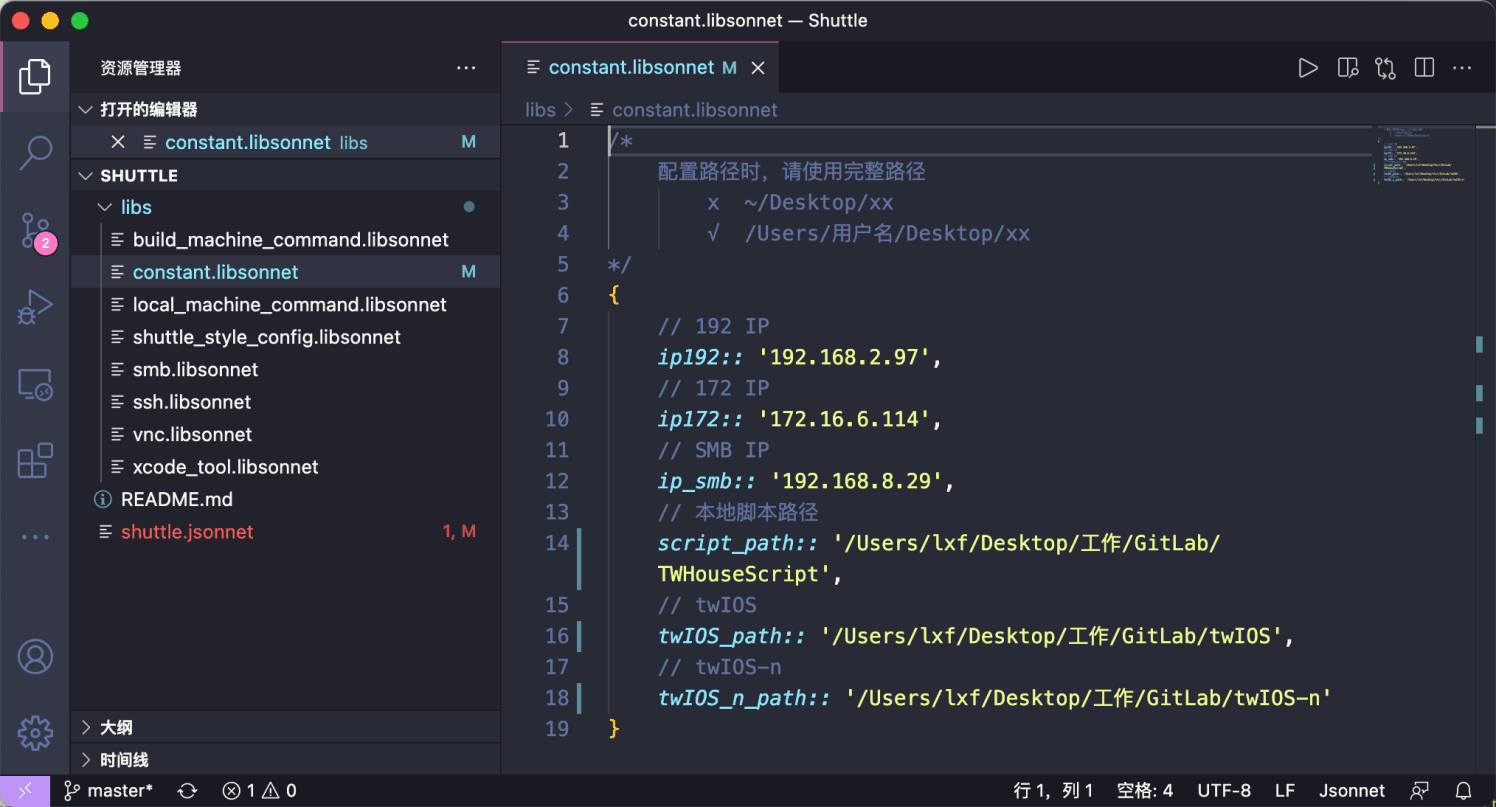
在 shuttle.jsonnet 文件里,定义了整个 Shuttle 的配置内容

这有个好处,当新人进来时,你需要他能马上介入到打包和发版时,只需要把 Shuttle 配置好即可。
而配置 Shuttle 只需要调整 constant.libsonnet 文件后执行一行命令!
jsonnet . shuttle.jsonnet -o ~/.shuttle.json

- 01
- Flutter - GetX Helper 如何应用于旧页面06-14
- 02
- Flutter - GetX Helper 助你规范应用 tag06-08
- 03
- Flutter - Xcode16 还原编译速度04-05
